FAQ & Tips
Get answers to all the questions you have about MyBizMailerLast Updated: 10/25/2013 10:05:51 AM
How can I import subscribers?
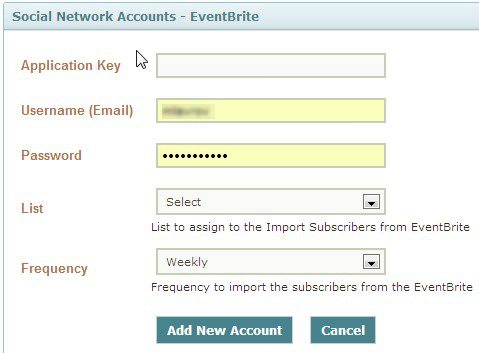
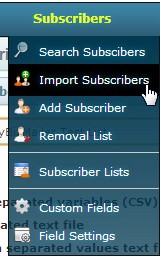
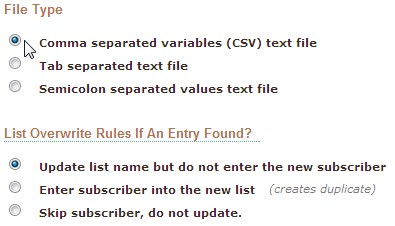
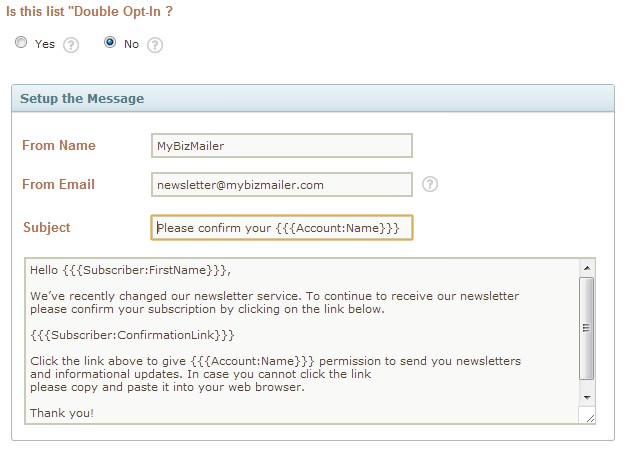
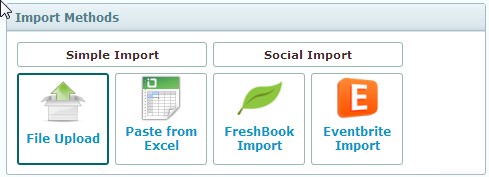
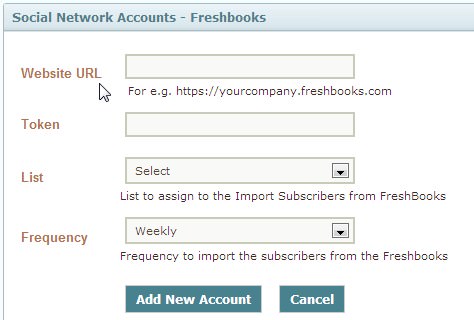
After you've created a Subscriber List for importing an existing subscriber list into your MyBizMailer account is simple and straightforward. What import formats can I use? To get started, your subscribers need to be in a comma or tab delimited text file. This is a standard format for storing data and is supported by most applications, including Microsoft Excel, Microsoft Outlook, and Outlook Express. CSV also known as Comma separated variables are fields separated by a comma and each subscriber is on a new line. A CSV file needs to be formatted before importing it into your account. If you need help preparing your CSV file for import please click here. If you are importing data from Freshbooks click here. If you are importing data from Eventbrite click here. 1. Sign in to your MyBizMailer account 2. Hover over the Subscribers tab in the Navigation bar. A drop down menu will appear. Look for and then click on the "Import Subscribers" option from the drop down menu. A new page will load. 3. From the drop down menu located on the page please select the list that you'd like to import your subscribers to. 4. After you've selected the list that you want to import your subscribers to the next two options are the File Type and the List Overwrite rules. For most MyBizMailer clients the default options as shown below will be perfect. The two main file types that can be imported are .CSV or .TXT files. 5. Is this List "Double Opt-In"? During the import process you will be asked if your list is a Double Opt-In list. If you click "Yes" you'll be moving onto Step 6. If you click "No" you will now be able to send out a confirmation message to this list. You have the ability to set the "From Name" the "From Email" the "Subject Line" and you can tweak and modify the "Message" that your potential subscribers will see as well. Once you've set up your confirmation message you will move onto Step 6. 6. In order to complete importing your subscribers, you need to select a file that is residing on your harddrive. Locate your file and click Upload. 7. This next step is Mapping the Subscribers you are importing into MyBizMailer. This is the the final step to importing your subscribers. After you clicked Upload earlier you should be taken to a page that looks like this: Mapping Subscribers is about having all the data shown matching up correctly. So we go column by column to ensure that the data we are importing is going to be mapped to the MyBizMailer servers properly. In our example we can see that the first column of imported data is the Name of our subscriber. So from the pull down field in the "Name This Column" highlighted box we want to select "First Name". See the example image below: Then we just go column by column matching up the imported data to the options available from the pull down menus. Here's an example mapping the email fields: If you happen to come across a column that does not have any information to import then it's highly recommended that you delete that column so that you don't import useless data. Once you click delete for this column you will see the following: 8. Once you’re done adding all the necessary information, click Map Fields and Import. 9. You've successfully mapped your subscribers! You should now see a screen similar to this: 1. Go to your excel sheet, enter the necessary information (such as first name, last name, email address) then go to file, Save As, and click on Other Formats on the bottom of this page. 2. A new window will open where you will then click on the drop-down arrow to where you will choose CSV (Comma delimited)(*.csv) 3. Name the file and click save. On the far right of the Importing Subscribers page you will see some additional options to import subscribers to your lists. There are four options listed: 1) To import data from Freshbooks click on the Freshbook Import button listed on the right side of the Import Subscribers page. 2) You will be directed to a new page that looks like the image below: Please fill in and select all the fields available. Website URL: Please input your Freshbooks website URL. Each and every Freshbooks client is given their own specific Freshbooks URL. Your URL is normally yourcompanyname.freshbooks.com, and you decide what it is when you first sign up for an account. You, your team, and your clients log into FreshBooks using this URL. Token: Please key in your Freshbooks Token. To learn how to get your Freshbooks Token click here. List: From the pulldown menu please select the list the you'd like to import your subscribers to. Frequency: From the pulldown menu please choose the frequency that you'd like MyBizMailer to import subscriber data from Freshbooks. Your options are Daily, Weekly, or Monthly. Click Add New Account once complete. 1) To import data from Freshbooks click on the Eventbrite Import button listed on the right side of the Import Subscribers page. 2) You will then be redirected to a new page that looks like the image below: Application Key: Every Evenbrite account is issued and Application Key To find out what you Key is please click here. Username (Email): Please input your Eventbrite Username here. Password: Please input your Eventbrite password here. List: From the pulldown menu please select the list the you'd like to import your subscribers to. Frequency: From the pulldown menu please choose the frequency that you'd like MyBizMailer to import subscriber data from Eventbrite. Your options are Daily, Weekly, or Monthly. Click Add New Account once complete.
How To Import a CSV Subscriber List Into MyBizMailer


To prepare a CSV file, follow the steps below:

![]()
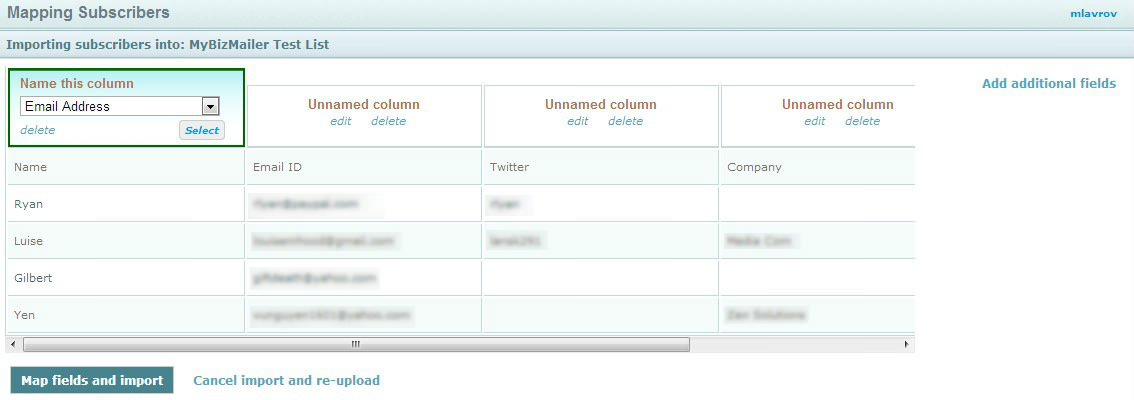
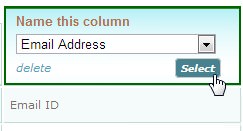
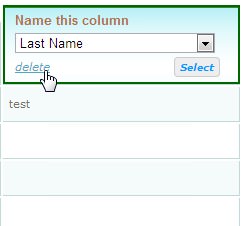
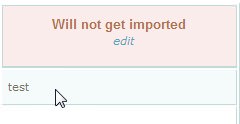
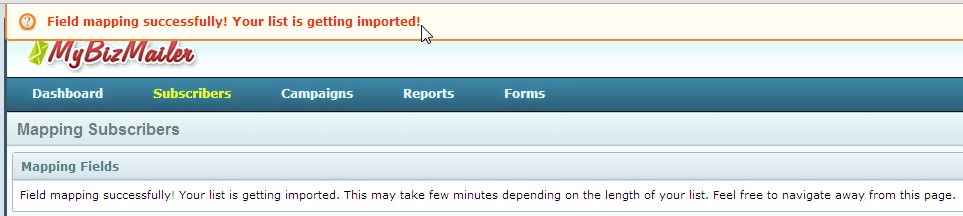
ADDITIONAL QUICK IMPORT OPTIONS
Importing Data From Freshbooks

Importing Data From Eventbrite