FAQ & Tips
Get answers to all the questions you have about MyBizMailerLast Updated: 1/3/2014 3:09:08 PM
How can I create a Campaign?
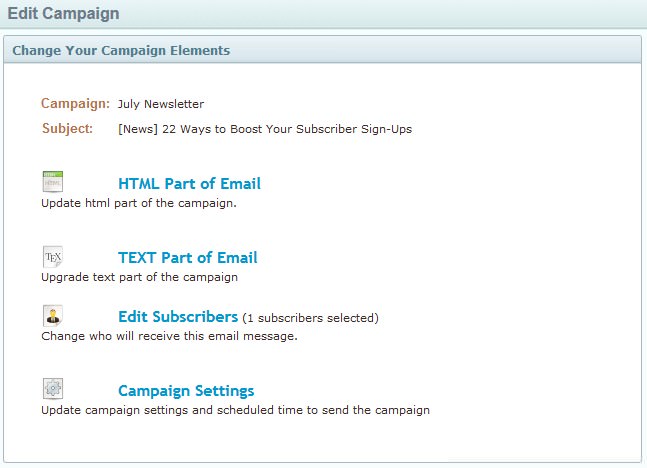
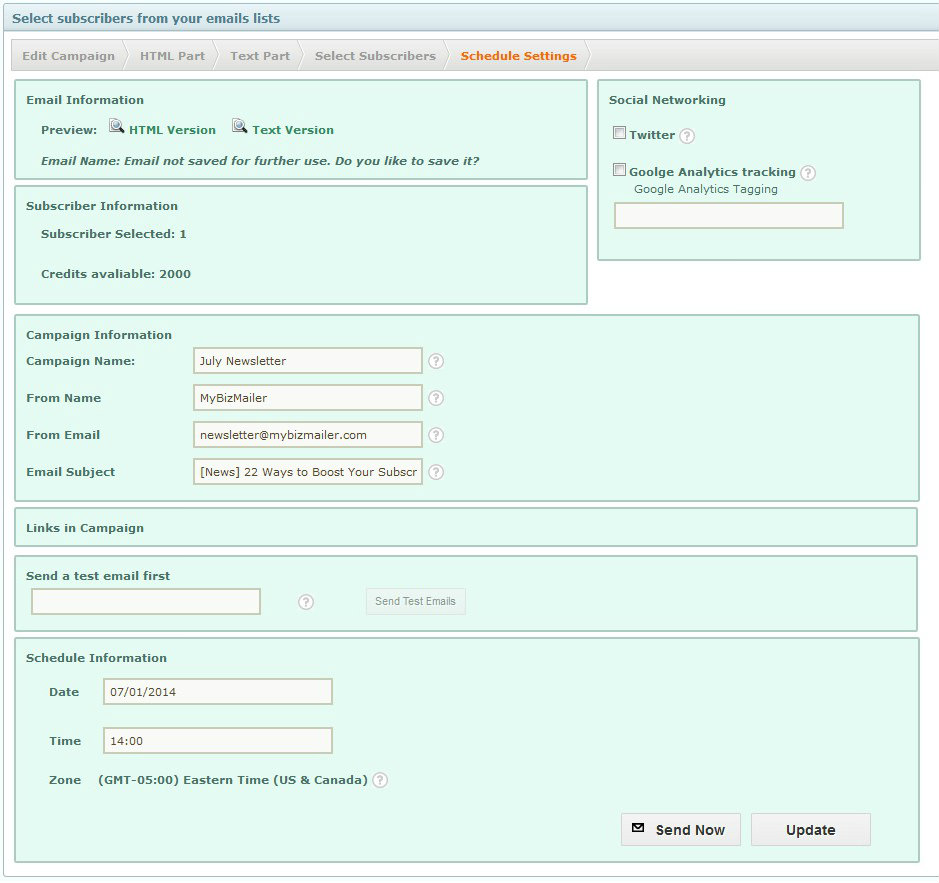
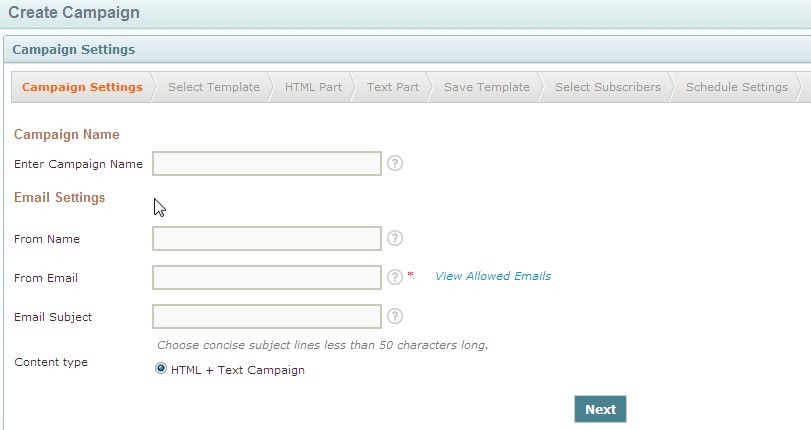
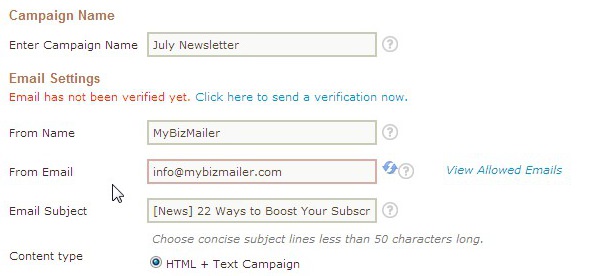
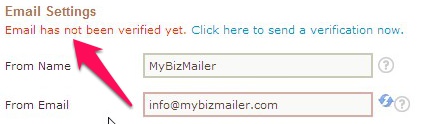
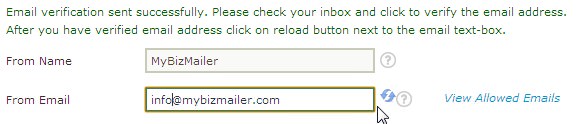
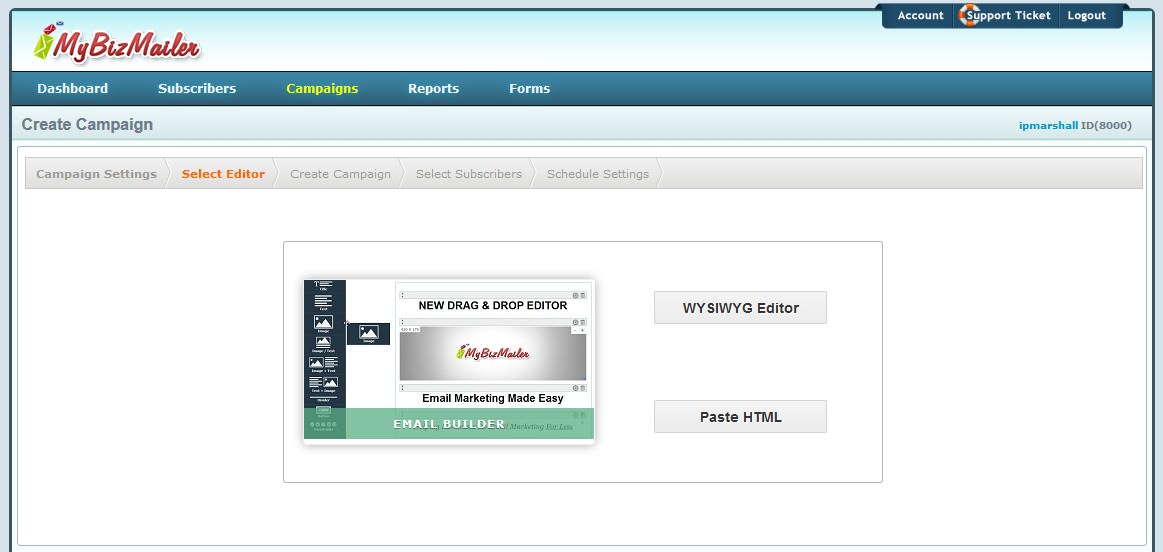
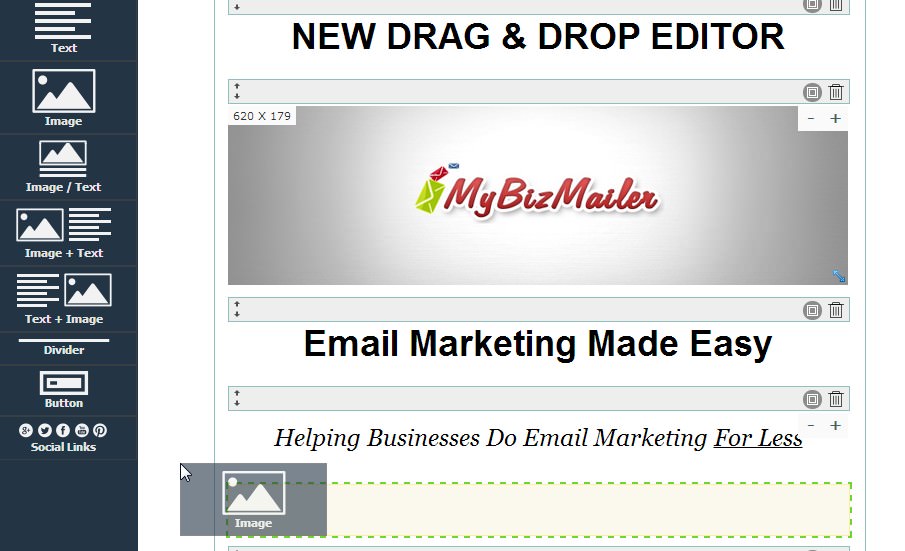
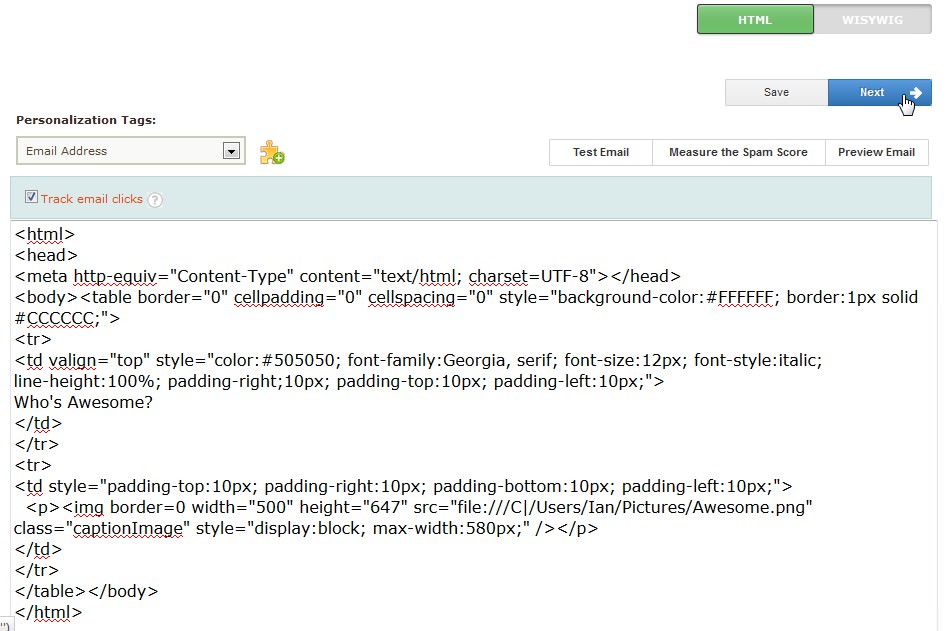
With MyBizMailer, you can tailor your email marketing campaigns to drive sales, boost engagement, surprise and delight your clients and stay top-of-mind with your audience for your niche. You can use an email campaign to keep in touch with existing clients letting them know about upcoming sales, events or special discounts. Or, you can branch out to new markets in search of new customers and increase traffic for your small or large business. Whatever your goals are, MyBizMailer has the software that can help you prepare and deliver a world-class email marketing campaign. Below you will find step-by-step instructions on how to create a Campaign using MyBizMailer. 1. Log into your MyBizMailer account 2. Hover over the Campaigns section of the menu bar and choose to "Create Campaign" 3. After you click on "Create Campaign" you will be taken to a page that looks like this: Please take a moment to fill in the required fields. Here's a screen shot of what the fields may look like for an upcoming newsletter campaign: After you've filled in the above fields click "Next". Veryfying Your Email With MyBizMailer If this is one of the first campaigns that you're creating then you may notice that as you fill in the "From Email" field a little message may appear saying "Email has not been verified yet. Click here to send a verification now." If you receive this message please click the "Click here to send a verification now". Once you click that link you will see the following message appear: An email will be sent to you shortly. Please click the link and follow the instructions contained within it to verify your email address so you can begin to send email campaigns from your MyBizMailer account. 4. After you've filled in the fields above and have clicked next you will be taken to the page where you'll select an editor to use to create your email campaigns. The screen should look like this: Option 1 - The Drag & Drop Editor: The New Drag & Drop Editor is super-easy to use. It'll have you creating email marketing campaigns in minutes. Also the emails created using this editor look great on mobile devices as well. Here's a screenshot of the Drag & Drop Editor: Here's a link to a video overview of the Drag & Drop Editor: Option 2 - The WYSIWYG Editor: Use MyBizMailer's WYSIWYG Editor to create your campaign. WYSIWYG stands for "What You See Is What You Get". It does require a little bit more technical know-how or determination compared to the Drag & Drop Editor. But, if you can use Microsoft Word then you'll be able to jump right in and create a campaign using our WYSIWYG editor. Below is a screenshot of what the editor looks like. Here's a link on How to Use the WYSIWYG Editor: Option 3 - Paste Your HTML: This option is great to use if you've designed your email in a program like Dreamweaver. All you'll have to do then is paste the HTML from your program into the MyBizMailer platform. Here's a screenshot of the "Paste HTML" screen. Here's a link to an overview on how to use the Paste HTML option: After you select one of the 3 options above you can then edit your email and include whatever text and images you like (all images are stored on the MyBizMailer servers so you don't have to incur any additional hosting fees). Once you're finished updating your email campaign - click "Update" and you'll then move onto the next step of creating a campaign. 5. You should be taken to the "Campaign Elements" Screen next which looks like this: From this page click on the "Edit Subscribers" link. You will then be taken to the "Select Subscribers" page. 6. Once on the "Select Subscribers" page you have the ability to pick and choose the subscriber list that you want to send your campaign to. You have the ability to send to multiple lists (any duplicate emails will NOT receive multiple emails). Select the list(s) that you want to send this campaign to and click "Update" 7. You will then be taken back to the "Campaign Elements" Page - next you will want to select the "Campaign Settings" option: Once you click on the "Campaign Settings" option you will be taken to a page where you can verify all the elements of your campaign, include social status update functionality, add google tracking elements and finally schedule the time that this campaign should be delivered to your subscribers. Once you've gone over all the elements of your campaign, scheduled the time for delivery and everything looks great click "Update". Congratulations you've successfully created a Campaign! 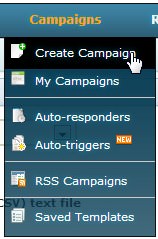
http://mybizmailer.com/kb/Campaigns/video-demo-of-the-new-drag-drop-editor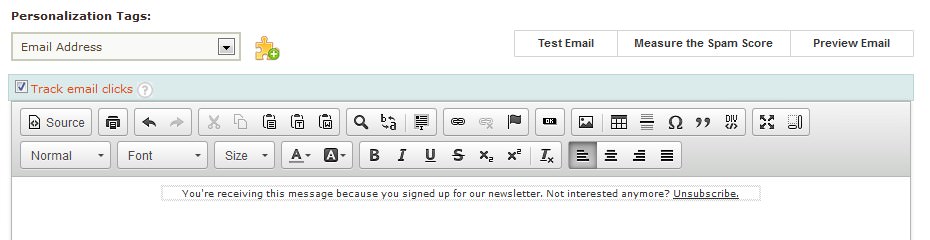
http://mybizmailer.com/kb/Campaigns/how-to-use-the-new-wysiwyg-editor
http://mybizmailer.com/kb/Campaigns/how-to-use-the-image-auto-detect-functionality-when-copying-pasting-html